

ON THIS BLOG, WE’LL POST HOW TO BUILD A HOLLOW WOODEN SURFBOARD / STAND-UP-PADDLE & SUP PADDLE USING ONLY INFORMATION TAKEN ON THE WEB
Visualizzazione post con etichetta Retro Fish TOA. Mostra tutti i post
Visualizzazione post con etichetta Retro Fish TOA. Mostra tutti i post
giovedì 1 novembre 2012

venerdì 12 ottobre 2012


domenica 2 settembre 2012


martedì 5 giugno 2012
RETRO FISH TOA 5'6" - BUILDING NOSE 1 of 2
BUILDING
NOSE 1 of 2
(Work
time – 1 h for wood block and 2 h for shaping )
The
nose will be built using three layer of balsa and two of mahogany.
 |
| 1st and 2nd block glued |
 |
| nose paper template will give final shape |
 |
| After initial rasping |
 |
| …and sanding |
 |
| …almost finished..! |
lunedì 21 maggio 2012
RETRO FISH TOA 5'6" - THE ITALIAN JOB
Saturday,
one of the most important HWS website has dedicated an article to TOA
!!

Don’t
You believe it?
See
now our page “ARTICLES” or click directly on www.woodensurfboards.blogspot.com
Thanks
again Grant !
sabato 19 maggio 2012
RETRO FISH TOA 5'6" - SHAPING RAILS 1 of 2
SHAPING
RAILS 1 of 2
(Work
time – 3-4 h each side)
After
gluing all layers it’s time to progress to one of the most
important part of the board…the rail shape is closely
related
to the performance and manoeuvrability.
For
this step is fundamental to follow strictly
the design and to have in mind exactly the building procedure.
In
summary we have take 6(six) section each
30cm and using CAD we have drawn for each section 3 triangles
corresponding to the material to remove. After having marked the
sections on the board we started to mark one point on deck and one on
side corresponding to the hypotenuse
of the first triangle.
To
link all the points
of the deck making a line and the same for the side.
Now…rasp
away the triangle for all length.
A
lot of work but
it’ s amazing to see more and more the board take shape.
.... following pics shown our method:
 |
Take
away extra material
|
 |
Six sections
|
 |
A
long splint is very useful to link all points
|

 |
Rail marked and ready for rasping
|
 |
First
step completed
|
giovedì 17 maggio 2012
RETRO FISH TOA 5'6" - BUILDING RAILS
BUILDING
RAILS
(Work
time – 30 min +
24 h glue drying time each
layer !)
Finally
we start building rails…!
We
have to glue two layers of Samba plywood and five layers of cork,
total 30mm thickness each side.
 |
At
this stage the board is ready for building rails
|
 |
First
samba layer has to be drilled to save weight
|
Protect
bottom & deck with paper and to glue first layer using big
elastics and some weight to maintain desired shape during dry time
(24 H)
 |
First
layer and pressing technique
|
 |
First
layer and pressing technique
|
 |
Remove
as material as possible to the first layer
|
 |
Apply
glue to the first layer
|
 |
Second
layer pressed with the same pressing technique
|
 |
Once glued remove
extra wood
|
Lay down roll of cork on each side to take the template to cut off, after to apply glue and press it waiting 24 H for drying. Repeat the sequence for each cork layer.
 |
Cork
cutting operation
|
 |
First
cork layer glued and clamped
|
venerdì 4 maggio 2012
RETRO FISH TOA 5'6 - INTERNAL BLOCKS FOR FCS FINS AND LEASH
FCS
internal blocks for fins & leash
(Work
time – 1 hour +
24 h glue drying time)
Now
It’s
time to glue in all the backing blocks for the fins and leash plugs.
In
order top save time and money we have used reject of samba plywood to
glue each other.
 |
surface
preparation before gluying blocks
|
 |
Gluying
of the fin blocks in place
|
 |
internal
fin blocks top view
|
 |
Gluying
of the leash block in place
|
RETRO FISH TOA 5'6" - INTERNAL TAIL AND NOSE PREPARATION
Internal
Tail & Nose PREPARATION
(Work
time – 2 hours +
24 h glue drying time)
Internal
tail & nose reinforcements shall be shaped to match bottom curves
and internal rail splints.
Its
necessary to use paper template (extract to design) for positioning
correctly of al splints.
Once
the glue is dried use rasp for obtain the desired shape.
 |
alignment
phase on the actual shape using paper template
|
 |
preparation
& gluying of internal nose reinforcements
|
 |
UP:
gluying of int. tail reinforcements DOWN:alignment and Gluying of
upper int rail reinforcements
|
 |
before
& after wood carving
|
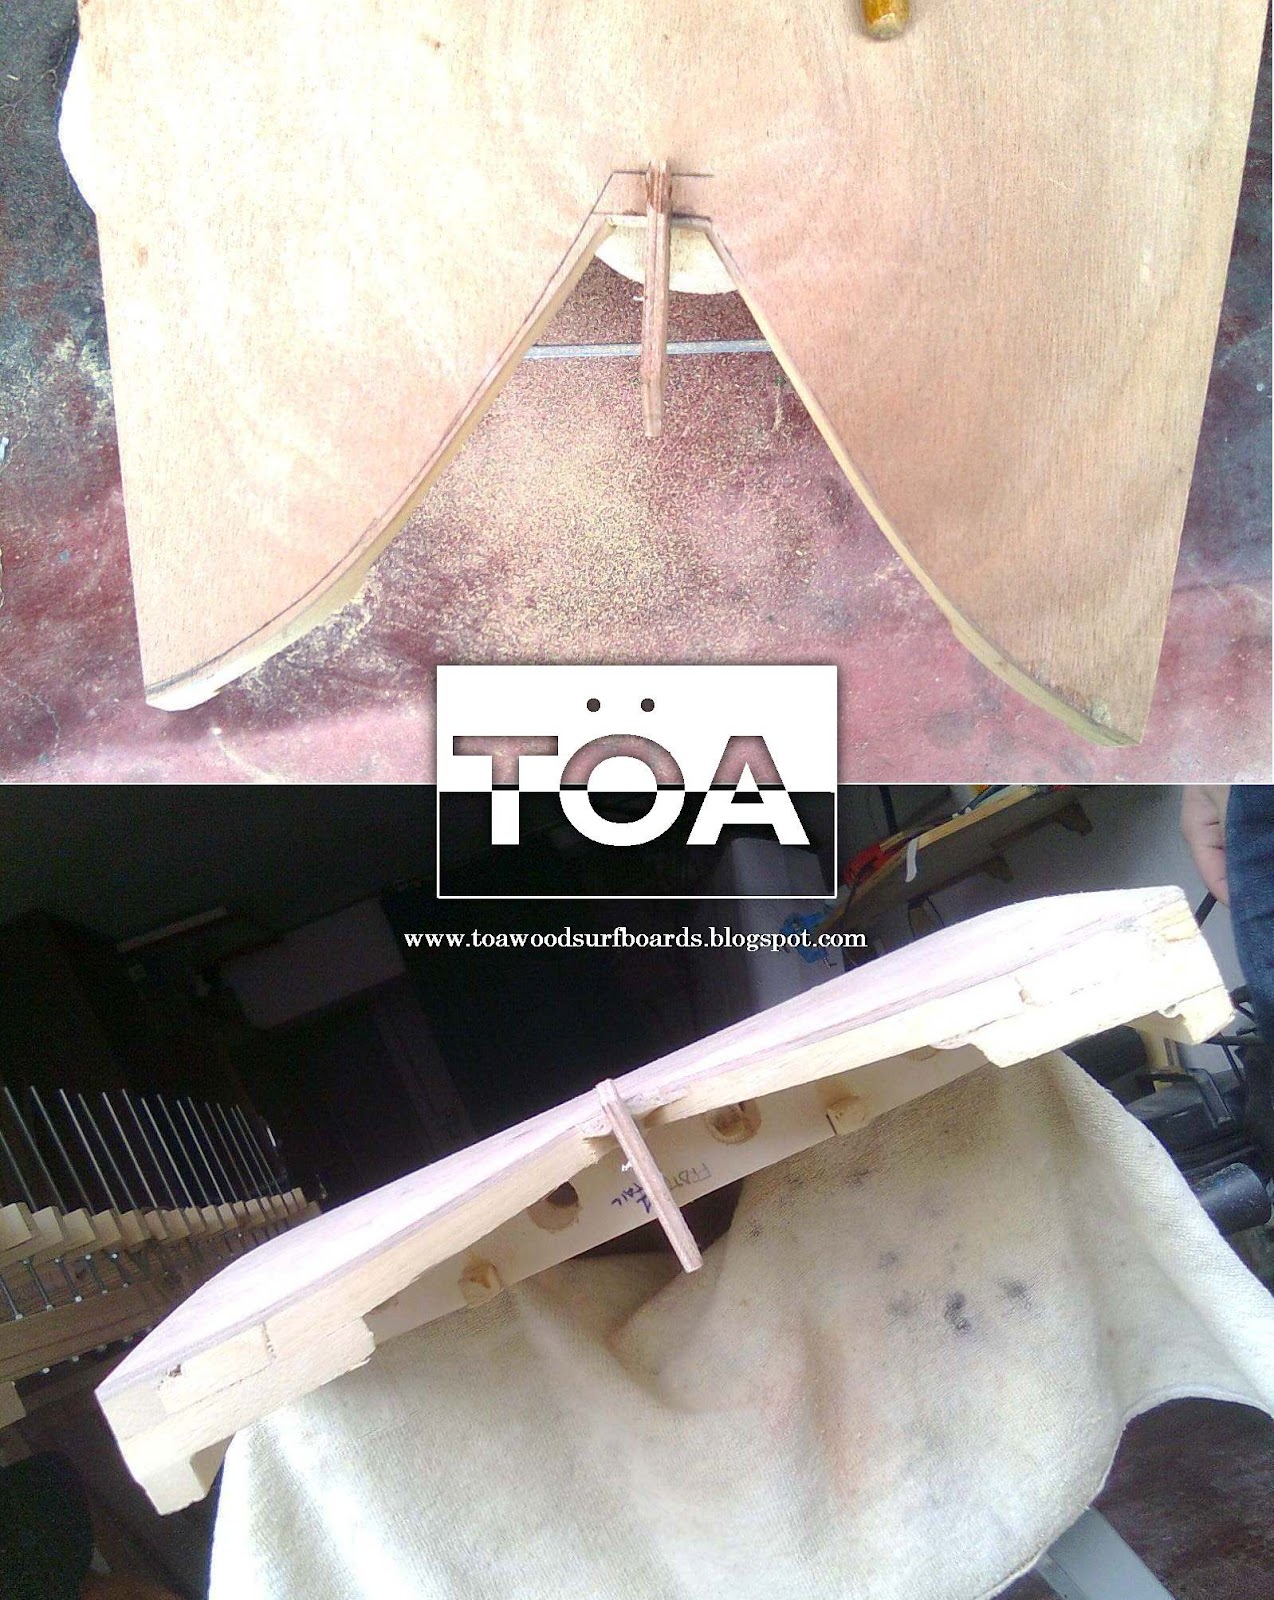 |
fish
tail takes shape..!
|
venerdì 27 aprile 2012
RETRO FISH TOA 5'6" - INTERNAL RAIL PREPARATION
Internal
Rail Preparation
(Work
time – 2 hours)
Once
the bottom
and deck plywood are glued it’s time to prepare lateral sides for
rails attachment.
 |
to
smooth with a plane
|
 |
to
check first layer interface
|
Rails
attachment wil be done in a second stage after installation of
internal tail & nose reinforcements
venerdì 20 aprile 2012
RETRO FISH TOA 5'6" - TO GLUE DECK PLYWOOD
To
glue
Deck Plywood (Work
time – 1 hours + 24 h glue drying time)
 |
cover
rails with paper Scotch
tape
|
 |
domed
deck look
pretty good!
|

domenica 15 aprile 2012
RETRO FISH TOA 5'6" - TO GLUE BOTTOM PLYWOOD
To
Glue
Bottom Plywood (Work
time – 1 ½ hours + 24 h glue drying time)
Once
the fishbone is ready,
internal struct. can be glued to the bottom plywood:
_
Lay down frames/Spine on bottom to mark out position on it using
pencil
_
Place marked bottom plywood on the ART
_
Lay the polyurethane wood glue between mark lines in way of structure
_
press internal structure on bottom plywood using cross bar
_
wait for 24 h for drying glue time


 |
Glue
the frame to the bottom planks using the rocker table
|
 |
Pressing
the skin into the frame
|

 |
Frame
is now attached to the bottom planks
|
Iscriviti a:
Post (Atom)